

-----------------------------------------------------------------------------------------------------------------------------
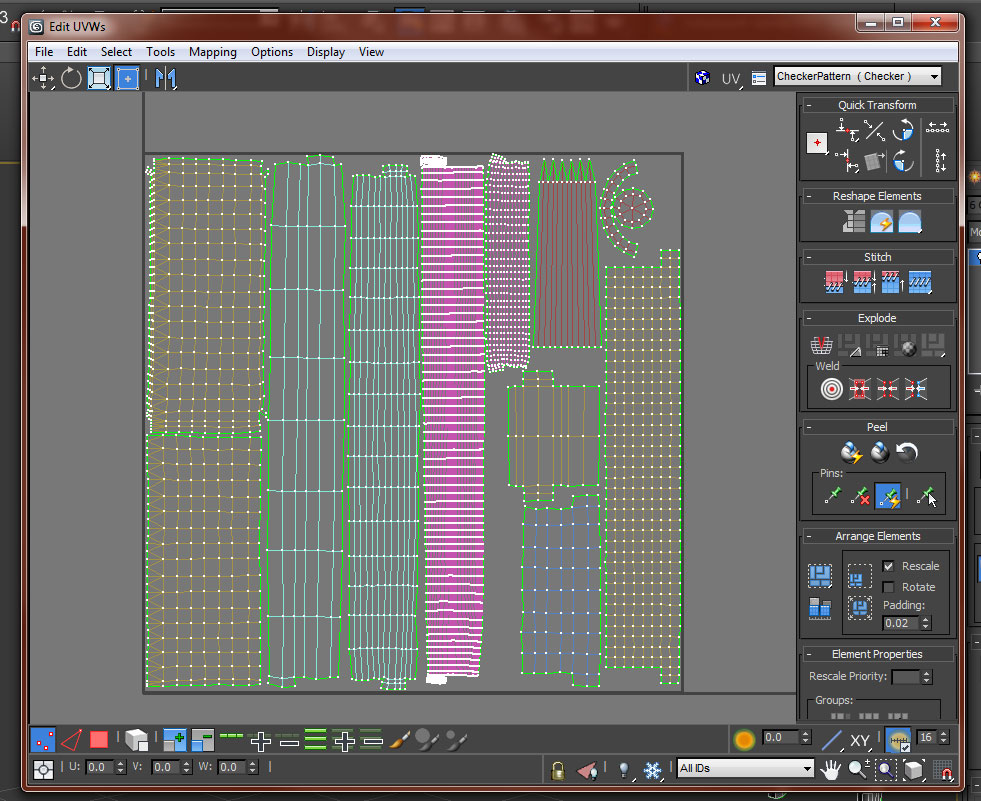
Starting Friday, I needed get this wooden board from Zbrush into Max and to properly render with Mental Ray. It took maybe 12-13 failed attempts and reimports. Just when I think I understand displacement maps, I find a new bug or subtlety I need to understand. When I encounter something new like that, I always need to figure it out. I know other ways of doing this but I don't like to take short cuts. I needed all the wood planks/boards for my market place stand to fit onto one UV space. This is for efficiency's sake. This is very very hard to do.

1.) First thing that went wrong - jumbled vertex IDs. I kept baking out maps in Zbrush and they came out all jacked up! The displacement map looked like one of those puzzles you have to slide the squares around until the picture is pieced together. After retrying maybe 8 times on Saturday. I gave up. Came back hours later and realized... I reimported new UVs and replaced old useless UVs in Zbrush. This is a little trick you can which is supposed to make Zbrush more approachable and fun. The idea is to just let you as an artist worry about creativity first, then technical issues like UVs later. Well, turns out, you CAN reimport new UVs onto an already sculpted model but Zbrush gets confused and re-assigns the vertex IDs. As a result, you'll recognize your UV islands in the map but each polygon is misplaced like some weird mosaic. I didn't even know about vertex IDs until it dawned on me I was doing everything correct but Zbrush wasn't keeping everything in order. After researching, I found that individual vertices have their own identification number of some sort. These got all screwed up when I tried reimporting good UVs. So in the end, that little trick was useless and just confused me, not to mention it wasted my entire Saturday!
2.) Second thing that went wrong - Turbo Smooth doesn't smooth your model and retain the shape. It only smooths your model uniformly according to smoothing groups. Seems obvious but for a long time I have been using Turbo Smooth to add geometry to my displaced models at render time which is used to produce more resolution and therefore more detail in the render. After wasting hours today, Sunday, I realized the reason my displaced models look distorted is because the shape that was being displaced was incorrect. When you displace geometry with a displacement map, the map is created to only displace the geometry properly from a specified form, the form used when you bake the low poly model. If any other shape is used, you will get a stupid looking distorted displacement in your render. Turbo Smooth smooths out your model which changes its shape. In the past, this was never a problem, I've actually been using Turbo smooth for years to add detail at render time. It might not have worked this time because I used a new workflow. I made a base mesh in Max then imported to Zbrush/sculpted then decimated and imported back to Max then used Freeform tools to retopologize then imported the new retopologized mesh into Xnormal along with the decimated mesh from Zbrush and baked out the displacement. I probably rebaked that one map 20 times or so this weekend. The solution was to stick with the low poly retopologized geometry and enable NURMS subdivisions on the right side window pane. I set it to 2 and it properly adds detail/resolution at render time.
I can't keep wasting time on such stupid things. My life is being wasted on technical issues and I'm not creating the art I would like to.